Ok! Here is the next installment in the renovation of my 101 year old New England home. In this chapter we'll cover the first steps in the removal of a central staircase. There are several reasons for removing this staircase:
- The house was originally a one-family home, however 30-40 years ago it was converted to a two family house. In order to meet fire-code, I have to add a second exit to the upstairs unit (on floors 2 and 3).
- The original staircase landing is inside the first floor unit.
- I'm changing the first-level floor-plan to make it more practical.
I had to be quite careful about this project, as the wall that was adjacent to the staircase was in fact bearing load. While not initially (101 years ago), intended to bear load, the floor above it had settled, putting a great deal of pressure on the framing. Here's a photo showing the last 4 remaining vertical framing elements.
This photo will help you to get oriented. See the door on the left? The entrance to the stairway headed upstairs is right in front of said door (which is open at the moment). It's behind the steel-framed wall. In the upper-right you can see the switch-back landing of said staircase. The four remaining vertical old-growth wood framing elements are also shown. These are under a great deal of load from the wall above.
Here is another perspective, looking up the staircase.
The switchback landing.
The last three steps up to the second floor landing. The Kitchen is ahead and to the left.
..and here we are underneath the landing.
Looking down from the top of the staircase.
The view down to the first floor. The dust in the air is from construction, and interfered with the auto-focus on my camera. Sorry about the blurry or 'noisy' photos!
Ok! Let's get to it. In this photo, I've removed the carpeting leading up to the first three stairs. Next, I used my crowbar and 3-lb hammer to begin to break apart the stairs. Note the stringers.
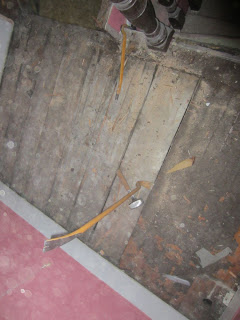
Next, I removed the flooring on the between-floors landing. The planks I'm standing on are the same as the ones we previously looked at in my subfloor post, and are also 7/8" thick.
Ok! Initial demo work completed. Note the circular saw. Later, I'll use it to cut the floor leading up to the three stairs. Stay tuned!
Another view, this time with the room below in-focus. Note the partially completed subfloor below.
The view from below. Note that most of the original wall framing is now gone.
Next, I knocked out the remaining framing, and then cut away the landing framing and joists. I then cleaned up, and called it a night. We'll continue in my next post, where I'll finish removing the staircase, including the steel-framed wall that you see in this photo.


No comments:
Post a Comment